Create a category

Categories are the building blocks of moni: where money comes from, where you keep it and where it goes. Add as many as you need, whenever you like.

Lesson 5 of 32 2 min
  1. Open the section it belongs to

    Open Expenses from Home or Menu. The Categories tab shows the ones you have, and the last tile is always New category.

    Income and Balance work the same way. In the From and To lists of a new transaction, New category closes each section too.
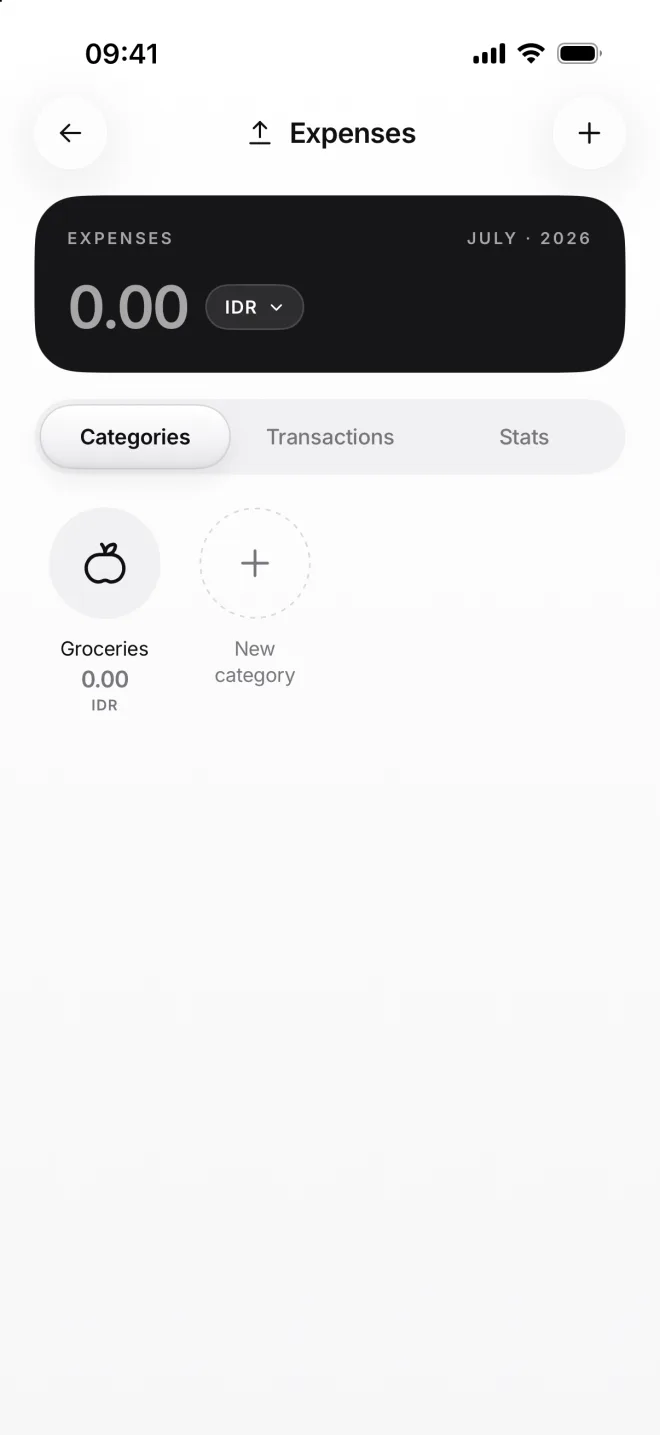
    The Expenses page with Groceries and the New category tile
  2. Name it and choose an icon

    Type a name, like Dining out. It starts in your main currency: tap the currency code next to the name to choose another one.

    Icons come in groups, like Food, Home or Transport. Swipe the row of groups and tap the icon that fits, like a fork and knife.
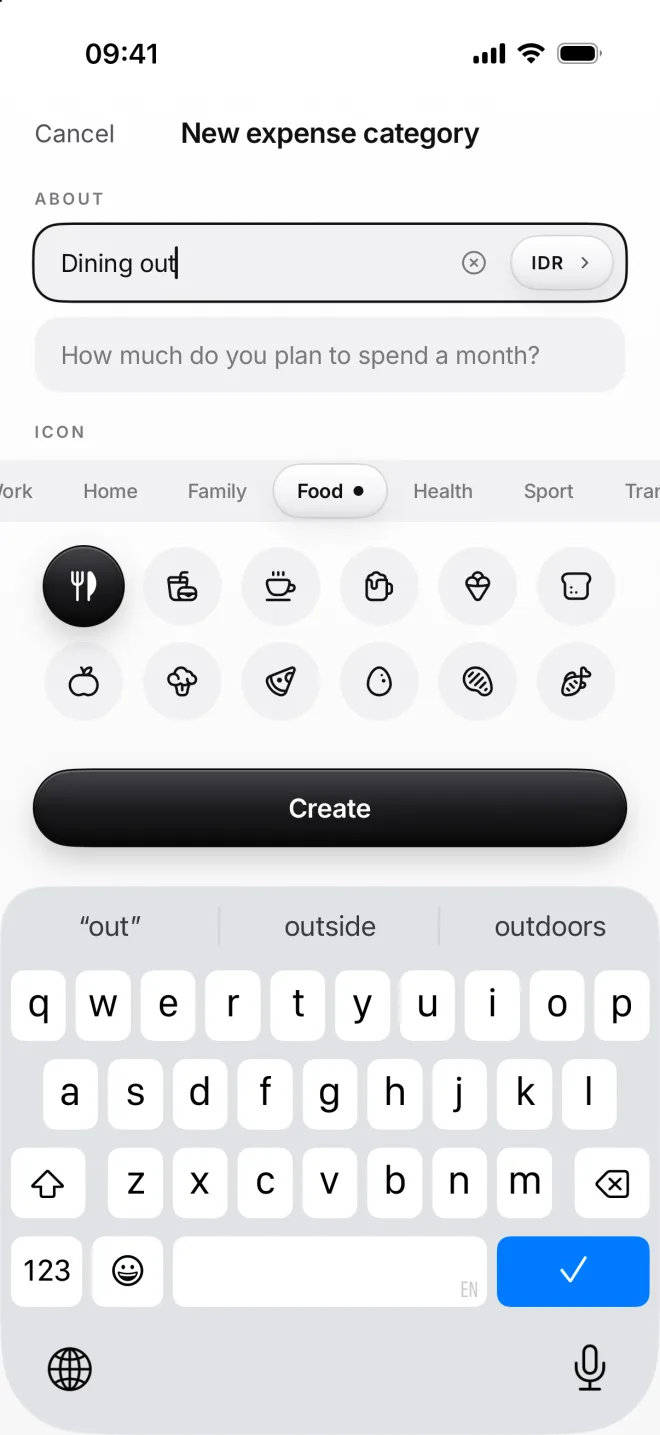
    New expense category: the name Dining out in rupiahs, the Food group open and the fork and knife picked
  3. Tap Create

    The category appears in its section right away, at the end of the grid. Its tile shows how much went through it this month.

    Expense tiles also have a dial that fills up as you spend from the category’s budget. You’ll set your first one in lesson 6.
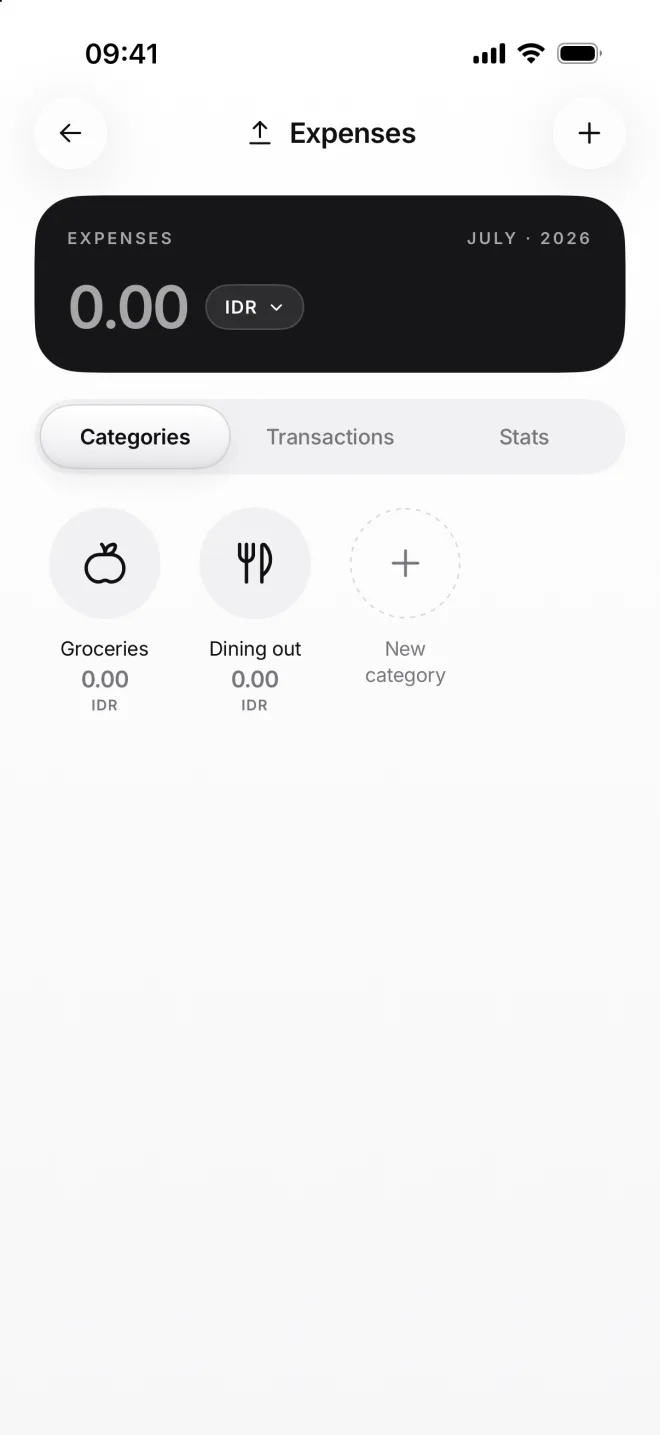
    The Expenses page with Groceries and the new Dining out

If something goes wrong

Create stays grey
A category needs a name that isn’t taken in its section yet. If moni says you already have a category with this name, choose another one or rename the old one.
Can I change the currency later?
Yes, in Edit category. If the category already has transactions, moni asks first: their amounts stay as they were entered, and only new ones use the new currency.
Can I use an emoji?
Yes. The last chip after the icon groups holds emoji: tap it and pick any Apple emoji on the keyboard. Lesson 32 shows it step by step, along with colors.
How many categories can I have?
As many as you like, in every section. Keep each list short enough to pick from quickly: you can always add more later, or delete the ones you no longer need.